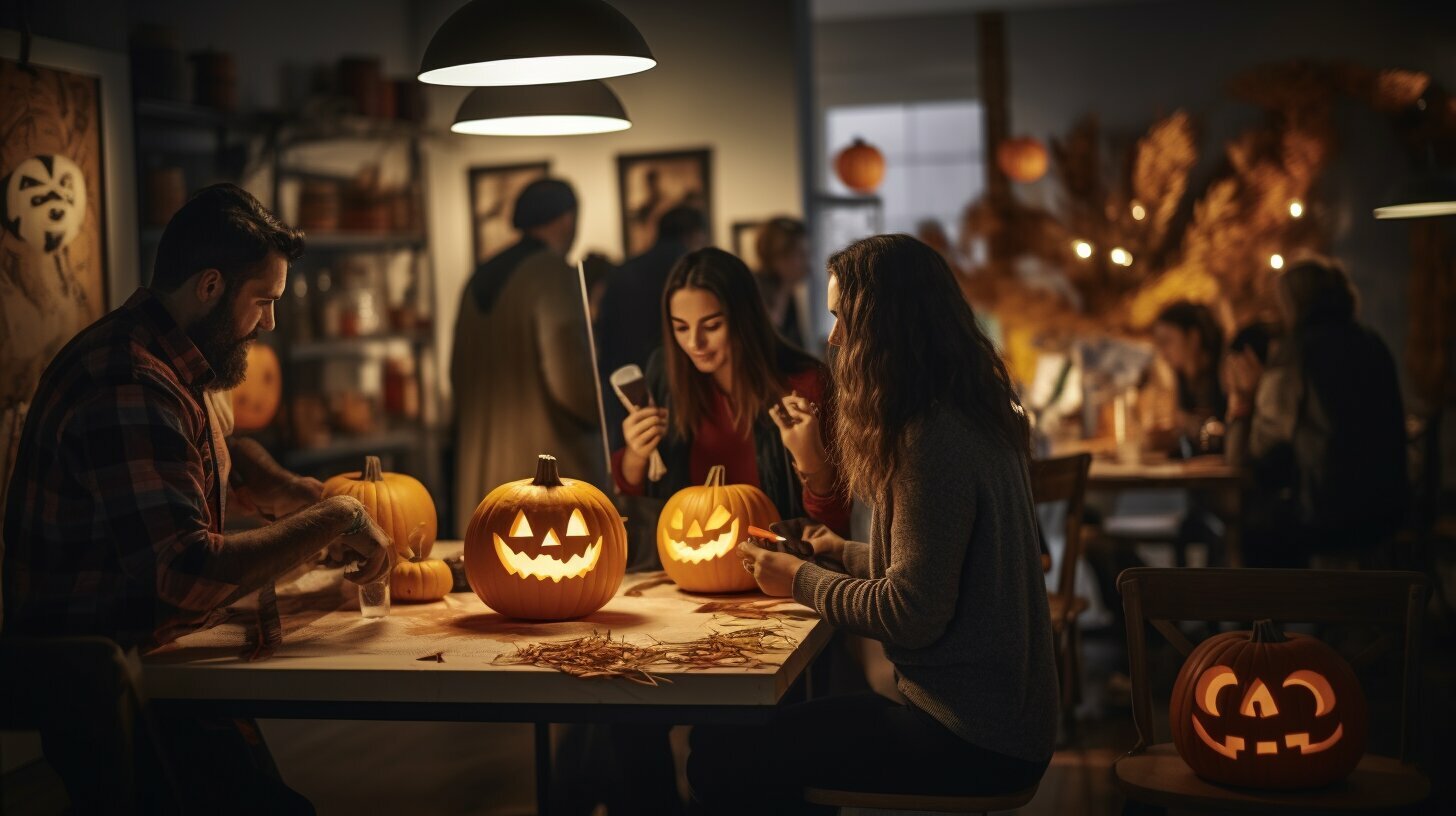
Halloween is the perfect time to show off your creativity with pumpkin carving. From spooky designs to cute and playful creations, there are endless possibilities. Here are some pumpkin carving ideas to inspire you this Halloween.
Key Takeaways
- Get creative with pumpkin carving this Halloween
- Try intricate designs like a witch’s brew or a skull face
- Create abstract patterns inspired by ceramics or botanicals
- Transform your pumpkin into unique objects like a pineapple or an RV
- Spread positivity with kind messages carved into your pumpkin
Witch’s Brew Pumpkin
If you’re looking for a pumpkin carving idea that will truly impress, consider creating a detailed design of a witch’s brew pumpkin. This intricate and challenging design features a witch stirring her cauldron with smoke spewing out. It’s a perfect choice for those who want to showcase their carving skills and add a spooky touch to their Halloween decorations.
To achieve this design, start by selecting a large pumpkin with a smooth surface. Use a stencil or draw the outline of the witch, cauldron, and smoke onto the pumpkin. With a sharp knife or pumpkin carving tools, carefully cut out the shapes, making sure to carve the details of the witch’s face, clothes, and cauldron. For the smoke, consider carving wavy lines or using a drill to create a textured effect.
Enhance the design by adding lighting inside the pumpkin. You can use a battery-operated LED light or a candle, but make sure to create ventilation holes at the top for the smoke to escape. Place your witch’s brew pumpkin in a prominent spot, whether it’s your front porch or a centerpiece for your Halloween party. Get ready to impress your friends, family, and trick-or-treaters with this stunning and spooky pumpkin carving idea.
Materials Needed:
- Large pumpkin
- Stencil or drawing of a witch, cauldron, and smoke
- Sharp knife or pumpkin carving tools
- Battery-operated LED light or candle
Instructions:
- Select a large pumpkin with a smooth surface.
- Trace or draw the outline of a witch, cauldron, and smoke onto the pumpkin.
- Using a sharp knife or pumpkin carving tools, carefully carve out the shapes, paying attention to the details.
- Create ventilation holes at the top of the pumpkin.
- Place a battery-operated LED light or candle inside the pumpkin.
- Display your witch’s brew pumpkin in a prominent spot and enjoy the spooky ambiance.
With a little patience and creativity, you can bring the magic of a witch’s brew to life with a stunning pumpkin carving. This design is sure to be a standout in your Halloween decorations and impress everyone who sees it.
Toothy Grin Pumpkin
Looking for a pumpkin carving idea that will leave a lasting impression? Why not give your pumpkin a big toothy grin? Carving a wide mouth with large teeth is a fun and playful way to create a unique pumpkin design. Depending on the style of the eyes, you can make your toothy grin pumpkin look friendly or frightening, adding a touch of personality to your Halloween decorations.
To achieve the toothy grin effect, start by drawing a wide mouth shape on your pumpkin with a marker. Then, carefully carve out the shape using a pumpkin carving knife. Make sure to carve the teeth with precision, ensuring they are large and noticeable. You can also experiment with different tooth shapes to add variety to your design.
For an extra touch, consider adding illumination to your toothy grin pumpkin. Place a small LED candle or string lights inside the pumpkin to make the teeth glow, creating a spooky and eye-catching effect. You can also place your toothy grin pumpkin in a well-lit area to enhance its visibility.
Table: Tools and Materials for Carving a Toothy Grin Pumpkin
| Tools | Materials |
|---|---|
| – Pumpkin carving knife | – Pumpkin |
| – Marker | – LED candle or string lights |
| – Pumpkin carving templates (optional) | – Small carving saw or drill (optional) |
So, this Halloween, let your creativity shine with a toothy grin pumpkin. Whether you want to create a friendly or frightening look, this carving idea is sure to be a hit. Don’t forget to showcase your toothy grin pumpkin proudly and watch as it brings a smile to the faces of all those who see it.
Modern Cat Pumpkin
Looking for a subtle and sophisticated pumpkin carving idea this Halloween? Consider creating a modern cat pumpkin using a power drill. This unique design adds a touch of abstract art to your seasonal decor. Follow a tutorial to learn how to achieve this elegant and eye-catching look.
Using a power drill, you can carve a bunch of mini cats onto the surface of your pumpkin. The result is a pattern that is both cute and sophisticated. The abstract design of the cats adds a touch of modernity to the traditional pumpkin carving. It’s a great option for those who want to showcase their creativity in a unique way.
To create the modern cat pumpkin, start by drawing a guide on the pumpkin. Then, carefully use the power drill to carve out the shape of multiple cats. Vary the size and angle of the cats to add visual interest. Once you’re done carving, illuminate the pumpkin from the inside to bring the design to life.
Please note: When using power tools, always prioritize safety. Follow recommended guidelines, wear protective gear, and exercise caution throughout the carving process.
Skull Pumpkin
Add a spooky touch to your Halloween decor with a skull face pumpkin carving. This eerie design is sure to give your friends and family a fright. To achieve this haunting look, you can use a stencil or print an illustration of a skull to guide your carving. For an extra touch of creativity, consider adding extra details with scissors to create your own unique design.
The skull pumpkin carving is a popular choice for Halloween enthusiasts who want to create a bone-chilling atmosphere. Whether you opt for a simple and minimalistic skull or a more intricate and detailed design, the end result is sure to impress. To make your skull pumpkin even more eye-catching, you can illuminate it from within using a candle or LED light.
One of the advantages of carving a skull pumpkin is the versatility it offers. You can experiment with different expressions and styles to create a carving that matches your Halloween theme. From sinister and spooky to whimsical and playful, the possibilities are endless. So grab your carving tools and let your creativity run wild as you transform an ordinary pumpkin into a bone-chilling work of art.
Tips for Carving a Skull Pumpkin
- Choose a pumpkin with a smooth surface for easier carving.
- Use a small serrated knife or pumpkin carving tools for precise cuts.
- If using a stencil, secure it to the pumpkin with tape before carving.
- Start with the outline of the skull and gradually carve out the details.
- Be careful when handling sharp tools and take breaks if needed.
Remember, carving a skull pumpkin requires patience and attention to detail. Take your time and enjoy the process of bringing your spooky vision to life. Once your skull pumpkin is complete, proudly display it as a centerpiece or outside your home to give trick-or-treaters a bone-chilling surprise.
| Skull Pumpkin Carving Supplies | |
|---|---|
| Pumpkin | A stencil or skull illustration |
| Carving tools (small serrated knife, pumpkin carving tools) | Tape |
| Candle or LED light | Patience and creativity |
Ceramic-Inspired Pumpkins
If you’re looking for a unique and artistic approach to pumpkin carving, why not draw inspiration from ceramic displays? Create a stunning botanical pattern on the surface of your pumpkins by carving small leaves and droplets. The abstract design will add an elegant touch to your Halloween decor.
You can start by sketching out your desired pattern on the pumpkin’s surface using a washable marker. Then, carefully carve out the leaf shapes, varying the sizes and angles to create visual interest. For the droplets, use a small carving tool or even a melon baller to scoop out round indentations.
Once you’ve finished carving, place a small LED light inside the pumpkin to illuminate the intricate design. The glowing effect against the ceramic-inspired pattern will create a mesmerizing display. Arrange several of these carved pumpkins together to enhance the overall aesthetic and make a statement.
Creating a Botanical Pumpkin Display
To take your ceramic-inspired pumpkin carving to the next level, consider creating a botanical pumpkin display. Pair your carved pumpkins with real or artificial flowers, moss, and foliage to bring the theme to life. Use a large wooden tray or table as a base, arranging the pumpkins and botanical elements in an appealing composition.
Add depth and texture to your display by incorporating different types of pumpkins and gourds in various shapes and sizes. The combination of carved ceramic-inspired pumpkins with natural elements will create a visually striking centerpiece for your Halloween or fall festivities.
Remember to select flowers and greenery that complement the colors of your carved pumpkins. You can also incorporate seasonal elements like pinecones or miniature pumpkins to further enhance the display. By embracing the ceramic-inspired theme, you’ll create a unique and sophisticated Halloween decor that is sure to impress your guests.
| Pumpkin Carving Idea | Difficulty Level | Materials Required |
|---|---|---|
| Ceramic-Inspired Pumpkins | Intermediate |
|
Pineapple Pumpkin
Add a tropical twist to your Halloween décor with a pineapple pumpkin! This unique carving idea combines the spookiness of a jack-o’-lantern with the vibrant and prickly appearance of a pineapple. Transform your pumpkin into a creepy version of this tropical fruit to create a truly eye-catching display.
To carve a pineapple pumpkin, start by hollowing out the pumpkin and preparing it for carving. Then, create the signature pineapple texture by using a small paring knife or pumpkin carving tools to carve diagonal lines across the pumpkin’s surface. Be sure to vary the depth of the cuts to add dimension and realism to the design.
Once you’ve carved the pineapple texture, it’s time to add the finishing touches. Carve out the eyes, nose, and mouth of the pumpkin to create a face that’s both spooky and pineapple-inspired. For an extra touch, paint the carved sections of the pumpkin a bright yellow color to mimic the vibrant flesh of a real pineapple.
Table: Materials and Tools for Carving a Pineapple Pumpkin
| Materials | Tools |
|---|---|
| Pumpkin | Paring knife or pumpkin carving tools |
| Newspaper or plastic sheet | Marker or pencil |
| Pumpkin carving stencil (optional) | Scissors |
| Yellow acrylic paint | Paintbrush |
| Tea light or LED candle |
Once your pineapple pumpkin is complete, place a tea light or LED candle inside the pumpkin to illuminate the design from within. This will create a spooky glow that’s sure to impress your Halloween guests. Display your pineapple pumpkin on your porch or as a centerpiece for your Halloween party, and watch as it becomes the talk of the town!
RV Pumpkin
If you’re looking for a unique pumpkin carving idea that will surely impress your neighbors, why not create an adorable RV pumpkin? This charming design requires two pumpkins and some squash detailing to bring the mini RV to life. Follow a tutorial for step-by-step instructions on achieving this delightful Halloween decoration.
Start by selecting two pumpkins of different sizes. The larger pumpkin will serve as the body of the RV, while the smaller one will be the roof. Using a sharp knife or pumpkin carving tools, carefully carve out windows and a door on the larger pumpkin. Don’t forget to add details like wheels, a hitch, and even a chimney for added realism.
Once you have carved and cleaned both pumpkins, it’s time to attach them together. Use toothpicks or wooden skewers to secure the roof pumpkin on top of the RV body pumpkin. Make sure it is stable and won’t topple over. Finally, add squash or other vegetables as decorative accents, such as trees or shrubs surrounding the RV.
Your RV pumpkin is now ready to be displayed outside your front door or as a centerpiece for your Halloween party. This whimsical design is sure to catch the attention of passersby and bring a smile to everyone’s face. Get creative with your color choice and add LED lights inside for a mesmerizing glow. Happy carving!
“I wanted to create something different for my Halloween decorations, and the RV pumpkin idea caught my eye. It was a fun project to work on, and the end result exceeded my expectations. The RV pumpkin became the highlight of my outdoor display, and I received many compliments from neighbors and trick-or-treaters. I highly recommend trying it out!”
RV Pumpkin Carving Supplies:
- 2 pumpkins (different sizes)
- Pumpkin carving tools (knife, saw, scoop)
- Toothpicks or wooden skewers
- Squash or other vegetables for decoration
- LED lights (optional)
Step-by-Step:
- Select two pumpkins of different sizes.
- Carve windows, a door, wheels, and other details on the larger pumpkin.
- Carve the smaller pumpkin to serve as the roof of the RV.
- Attach the roof pumpkin on top of the RV body pumpkin using toothpicks or wooden skewers.
- Add squash or other vegetables as decorative accents.
- Place LED lights inside the RV pumpkin for a glowing effect (optional).
- Display your RV pumpkin proudly!
| Pros | Cons |
|---|---|
| Unique and eye-catching design | Requires two pumpkins |
| Can be a centerpiece for Halloween parties | Requires some carving skills |
| Allows for creativity with colors and decorative accents | May be challenging to secure the roof pumpkin |
Black Spray-Painted Pumpkin
Looking to add a touch of mystery and drama to your Halloween decorations? Consider the black spray-painted pumpkin. This unique carving idea gives a modern twist to the traditional jack-o’-lantern, creating an eye-catching centerpiece for your Halloween festivities.
To achieve this striking look, start by selecting a pumpkin with a smooth surface. Using a carving knife, carefully cut off the top and scoop out the seeds and pulp. Then, take a can of black spray paint and evenly coat the interior of the pumpkin. Allow the paint to dry completely before moving on to the next step.
Next, use a stencil or your own artistic skills to create a design on the exterior of the pumpkin. Consider carving intricate patterns or silhouettes that will stand out against the black background. Once you’ve finished carving, place a small LED light or candle inside the pumpkin to illuminate your design.
Benefits of the Black Spray-Painted Pumpkin:
- Unique and eye-catching design
- Adds a touch of mystery and drama to your Halloween decor
- Allows for intricate carving patterns to stand out
- Creates a modern and sophisticated look
So, this Halloween, let your creativity shine with the black spray-painted pumpkin. Whether you’re hosting a spooky gathering or simply want to impress trick-or-treaters, this unique carving idea is sure to make a lasting impression.
| Advantages | Disadvantages |
|---|---|
| Creates a striking centerpiece | Requires careful handling of spray paint |
| Allows for intricate designs to stand out | May be more time-consuming than traditional pumpkin carving |
| Modern and sophisticated look | Can be challenging to achieve a smooth paint finish |
| Can be illuminated with an LED light or candle | Requires artistic skills or the use of stencils |
Cute Cat Pumpkin
If you’re looking for a pumpkin carving idea that’s adorable and not too spooky, why not try carving a cute cat pumpkin? This charming design is perfect for cat lovers and will bring a smile to everyone’s faces. To create your cute cat pumpkin, follow these simple steps:
- Choose a medium-sized pumpkin that is round and smooth. This will give you a good canvas to work with.
- Draw or trace the outline of cat ears on the top of the pumpkin. You can make them pointy or round, depending on the look you prefer.
- Use a small serrated knife to carefully cut along the lines of the cat ears. Take your time and go slow to avoid any accidents.
- Next, draw or trace the outline of the cat’s eyes and mouth on the front of the pumpkin. You can make them big and round for a cute look or narrow and slanted for a mischievous expression.
- Using a pumpkin carving tool or a serrated knife, carefully cut along the lines of the eyes and mouth. Take your time and be precise.
- To add some extra detail, you can carve small whisker holes on either side of the cat’s mouth. This will give your pumpkin a playful touch.
- Once you’ve finished carving, place a battery-operated tea light inside the pumpkin to bring your cute cat pumpkin to life.
Display your cute cat pumpkin on your porch or in your home to add a touch of Halloween charm. This design is perfect for families, cat enthusiasts, or anyone who wants to create a fun and lighthearted atmosphere this Halloween.
Tips for a Perfect Cute Cat Pumpkin:
- Choose a pumpkin with a flat bottom to ensure stability when displaying.
- Practice carving on a smaller pumpkin or a practice pumpkin before tackling your main design.
- Consider adding some painted details to enhance the cuteness factor. You can paint the cat’s nose pink or add colorful accents to the ears.
- For added durability, seal the cut edges of the pumpkin with petroleum jelly to prevent early decay.
With a little creativity and some basic carving skills, you can easily create a cute cat pumpkin that will be the star of your Halloween decorations. Enjoy the process and let your imagination run wild!
Impaled Fence Pumpkins
Looking to create a truly spine-chilling display this Halloween? Consider adding a row of impaled fence pumpkins to your decorations. This eerie and macabre design is sure to give your guests a fright!
To achieve this haunting effect, start by carving menacing faces into your pumpkins. Think twisted smiles, sinister eyes, and jagged teeth. You can find pumpkin carving stencils online or create your own unique designs. Remember to cut out the top of each pumpkin and hollow them out to make space for a candle or LED light.
Once your pumpkins are carved, it’s time to create the impaled fence. You can use wooden dowels or bamboo skewers to create the illusion of pumpkins impaled on a metal fence. Arrange the pumpkins in a straight line or play around with different heights to add depth to your display.
| Fence Materials | Supplies Needed |
|---|---|
| Wooden dowels or bamboo skewers | Pumpkins |
| Wire or string for attaching the pumpkins | Pumpkin carving tools |
| Metal fence or fence-like material (optional) | Candles or LED lights |
If you want to take your impaled fence pumpkins to the next level, consider creating a backdrop. You can use a metal fence or create a fence-like structure using materials like cardboard or PVC pipes. Attach the fence to a sturdy base, such as a wooden board or weighted buckets filled with sand, to ensure stability.
Place your impaled fence pumpkins in front of the backdrop, securing them with wire or string. Add candles or LED lights inside the pumpkins to create a spooky glow. As night falls, the flickering lights and ominous shadows will add an extra layer of creepiness to your Halloween decor.
Scared Pumpkin
Looking to add a unique and unexpected touch to your Halloween decor? Consider carving a scared pumpkin. This design will surely surprise and delight your guests. With a wide-eyed and open-mouthed expression, the scared pumpkin adds a touch of fear and surprise to your festive display.
To create this carving, start by selecting a large pumpkin with a smooth surface. Draw or trace your design onto the pumpkin using a marker or pencil. Carefully carve along the lines, taking your time to create intricate details and sharp angles for the scared expression.
Once your scared pumpkin is complete, make sure to place it in a well-lit area to enhance its eerie effect. You can even add additional decorations, such as spiderwebs or faux spiders, to create a spooky scene.
| Materials Needed | Instructions |
|---|---|
| Pumpkin | 1. Select a large pumpkin with a smooth surface. |
| Marker or Pencil | 2. Draw or trace your scared pumpkin design onto the pumpkin. |
| Carving Tools | 3. Carefully carve along the lines of the design, creating intricate details and sharp angles for the scared expression. |
| Light Source | 4. Place your scared pumpkin in a well-lit area to enhance its eerie effect. |
| Optional Decorations | 5. Add spiderwebs or faux spiders for an extra spooky touch. |
With its unique and unexpected design, the scared pumpkin is sure to be a standout piece in your Halloween decor. Surprise your guests and create a memorable experience with this creative carving idea.
Be Kind Pumpkin
Spread positivity and good vibes this Halloween by carving sweet sayings into your pumpkin. Embrace the spirit of kindness and greet trick-or-treaters with uplifting messages that will warm their hearts. Transform your pumpkin into a beacon of love, joy, and well wishes.
Choose words that resonate with you and reflect the values you hold dear. Some inspiration for kind messages include “Be Kind,” “Spread Love,” “Choose Joy,” “Radiate Kindness,” and “Happiness Lives Here.” Carve each letter carefully to ensure clarity and legibility, creating a pumpkin that speaks volumes with its heartfelt message.
“Kindness is a language that the deaf can hear and the blind can see.” – Mark Twain
Remember, Halloween is not just about spooky and scary decorations. It’s also an opportunity to spread positivity and make a difference in people’s lives. A “Be Kind” pumpkin is a wonderful way to remind everyone that a little kindness goes a long way. So, grab your carving tools, let your creativity flow, and brighten up the night with your message of kindness!
| Key Points |
|---|
| Carve uplifting messages into your pumpkin |
| Choose kind words that resonate with you |
| Inspire others with positive messages |
| Spread kindness and make a difference |
Mickey Mouse Pumpkin
Bring the magic of Disney to your Halloween celebrations with a Mickey Mouse pumpkin carving. Create a delightful centerpiece or display that will enchant both children and adults. Follow a tutorial that provides printable stencils to guide you through the process of bringing this iconic character to life on your pumpkin.
To start, select a large pumpkin with a smooth surface. Clean and hollow out the pumpkin, removing all the seeds and pulp. Next, secure the Mickey Mouse stencil onto the pumpkin using tape, ensuring that it is centered and aligned. Use a pumpkin carving tool or a small serrated knife to carefully cut along the lines of the stencil, taking your time to create clean and precise cuts.
Once you have finished carving, gently push out the cut pieces from the design. Place a tea light or an LED candle inside the pumpkin to illuminate the carved areas and bring your Mickey Mouse pumpkin to life. Display it on your doorstep, porch, or as a charming addition to your Halloween decorations.
Tips for a Successful Mickey Mouse Pumpkin Carving:
- Choose a pumpkin with a smooth surface for better stencil adhesion
- Secure the stencil firmly with tape to prevent shifting during carving
- Take your time and carve slowly along the stencil lines for clean cuts
- Use a small serrated knife or a pumpkin carving tool for precision
- Illuminate the carved areas with a tea light or an LED candle for a magical effect
With a little patience and attention to detail, you can create a stunning Mickey Mouse pumpkin that will add an extra touch of enchantment to your Halloween festivities.
| Materials Needed: | Pumpkin | Pumpkin carving tools | Mickey Mouse stencil | Tape | Tea light or LED candle |
|---|---|---|---|---|---|
| Time Required: | Approximately 1-2 hours | ||||
| Difficulty: | Intermediate | ||||
| Estimated Cost: | Low | ||||
Thorny Pumpkin
Looking to add a touch of elegance to your Halloween decor? Consider carving a pumpkin with spiky edges, resembling a thorny plant. This unique design is sure to make a statement and can serve as a striking centerpiece or a captivating accent on your party platter.
To achieve the thorny look, I recommend using a linoleum cutter. Carefully carve out jagged edges along the pumpkin’s surface, creating the illusion of thorns. Take your time and make sure to maintain a steady hand for precise carving.
Once you’ve finished carving, place a tea light or LED candle inside the pumpkin to illuminate the intricate details. The light shining through the spiky edges will create a mesmerizing glow, enhancing the overall effect of your thorny pumpkin.
Whether you’re hosting a Halloween party or simply want a unique pumpkin carving idea, the thorny pumpkin design is a great choice. Its elegance and sophistication will impress your guests and make your Halloween decor truly stand out.
FAQ
What are some pumpkin carving ideas for Halloween?
Here are some pumpkin carving ideas to inspire you this Halloween.
How can I create a detailed design of a witch stirring her cauldron?
Carve a detailed design of a witch stirring her cauldron with smoke spewing out.
How can I create a pumpkin with a big toothy grin?
Carve a wide mouth with large teeth to give your pumpkin a big toothy grin.
What is a modern cat pumpkin?
Carve a bunch of mini cats using a power drill to create a cute and sophisticated look for your pumpkin.
How can I create a skull face pumpkin?
Use a stencil or print an illustration of a skull to guide your carving and add extra details with scissors for a unique design.
How can I create ceramic-inspired pumpkins?
Carve small leaves and droplets into your pumpkins to create an abstract botanical pattern inspired by ceramic displays.
How can I transform my pumpkin into a pineapple?
Carve the eyes and face of a realistic pineapple pumpkin and use painting skills to bring it to life. You can also add a green felt crown.
How can I create an RV pumpkin?
Follow a tutorial to learn how to create an adorable RV pumpkin with two pumpkins and squash detailing.
How can I create a black spray-painted pumpkin?
Use black spray paint on the inside of your pumpkin, letting some seep outside the eyes for an extra-ominous look.
How can I create a cute cat pumpkin?
Carve a design that features little feet and ears to create a charming cat pumpkin.
How can I create impaled fence pumpkins?
Arrange a row of fencing and carve pumpkins with impaled faces to create a spooky scene. You can also give overripe pumpkins a smushed look with a hammer.
How can I create a scared pumpkin?
Carve a pumpkin that expresses fear and surprise to add a unique touch to your Halloween decor.
How can I create a be kind pumpkin?
Carve sweet sayings like kindness, generosity, happiness, love, or well wishes into your pumpkin to spread positivity and good vibes.
How can I create a Mickey Mouse pumpkin?
Follow a tutorial with printable stencils to create a classic Disney character pumpkin, such as Mickey Mouse.
How can I create a thorny pumpkin?
Carve a pumpkin with spiky edges resembling a thorny plant for a unique and elegant design. Use a linoleum cutter to create a glowing effect.